A greenish ring around the yolk, rubbery whites that bounce back when pressed, or a runny center when you wanted it firm: all of these point to the same problem. The timing was off, and by even just two minutes, the result is something you did not plan for.
Knowing how long to boil eggs is not complicated, but it does require precision. This guide covers the exact boiling times for every doneness level, the correct technique to get there consistently, and the small habits that make peeling easier every single time.
Why Boiling Time Matters More Than You Think
Boiling an egg seems like the most basic cooking task imaginable. In practice, though, the proteins inside an egg are sensitive enough that a few extra minutes on the heat can completely change what ends up on your plate.
1. The Effect on Texture
Egg white proteins begin to coagulate at around 145°F (63°C), while yolk proteins set at a slightly higher temperature. The longer heat is applied, the tighter those proteins bind together, producing whites that turn rubbery and yolks that become chalky and dry.
A well-known sign of over-boiling is the greenish-gray layer that forms around the yolk. That discoloration comes from a chemical reaction between the iron in the yolk and the hydrogen sulfide released by the whites under prolonged heat. An egg boiled for exactly 10 minutes, removed promptly, and cooled immediately will have a fully set yolk that is still creamy at the center rather than crumbly throughout.
2. The Effect on Nutritional Value
Prolonged boiling does not just affect texture. Water-soluble vitamins naturally present in eggs, including B12 and riboflavin (also known as vitamin B2, which supports energy production and healthy cell function), can degrade with excessive heat exposure.
Research published by Healthline found that eggs baked for 40 minutes may lose up to 61% of their vitamin D content, compared to only around 18% when fried or boiled for a shorter period of time. This finding reinforces that both the cooking method and the duration directly determine how much nutritional value remains in the egg by the time it reaches the plate.
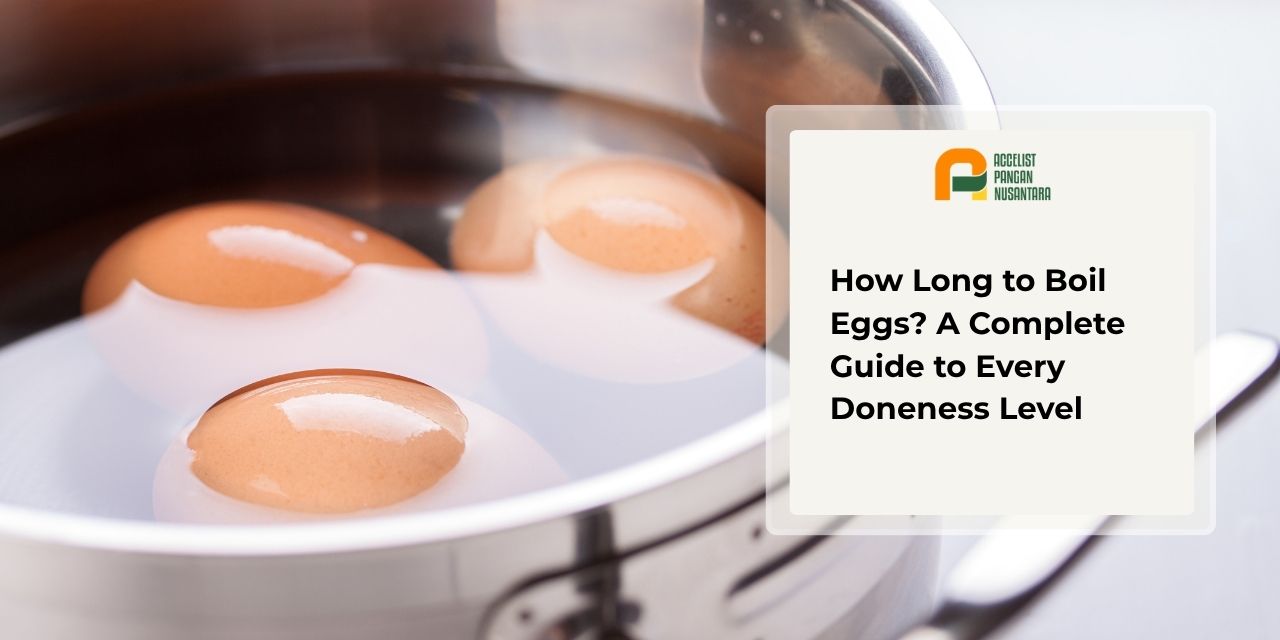
How Long to Boil Eggs: A Timing Guide by Doneness Level
There is no universal answer to this question because each level of doneness calls for a different duration. The times below are counted from the moment the water reaches a full boil, not from when the heat is turned on.
Soft-Boiled: 4 to 6 Minutes
At 4 to 6 minutes, the whites are fully set while the yolk remains liquid or very soft at the center. This is the sweet spot for anyone who wants the yolk to flow when the egg is cut open.
A 5-minute egg placed on top of ramen, a grain bowl, or toast will release a slow, rich pour of yolk that works as a natural sauce for everything underneath it. It is also the most visually striking option for brunch presentations or café-style breakfast plates.
Medium-Boiled: 7 to 9 Minutes
In this range, the yolk begins to firm up at the edges while staying slightly creamy in the middle. The white is fully cooked and easy to handle without the egg falling apart.
An 8-minute egg works particularly well in salads, sandwiches, and grain bowls because it can be sliced cleanly without the yolk running everywhere. It also holds its shape well enough to halve and plate neatly for a deviled egg base or a packed lunch.
Hard-Boiled: 10 to 12 Minutes
A 10 to 12-minute boil produces a yolk and white that are both completely firm all the way through. This is the most versatile option for meal prep, snacking, or cooking methods where the egg will be mixed with other ingredients.
Hard-boiled eggs hold up well in egg salad, chopped into soups, or used as a protein addition to noodle dishes. Avoid going beyond 12 minutes, as that is when discoloration and dryness become noticeable.
How to Boil Eggs Properly
Knowing the right timing is only half of the equation. The method used matters just as much if you want consistent results across every batch.
- Take the eggs out of the refrigerator first.
Let them sit at room temperature for 10 to 15 minutes before boiling. The temperature gap between a refrigerated egg (around 40°F / 4°C) and boiling water (212°F / 100°C) is large enough to crack the shell the moment it hits the heat. - Start with cold water, not boiling water.
Place the eggs in the pot first, then cover them with cold water by about 1 inch (2 to 3 cm) above the surface. Heating the eggs and water together gives a more gradual and even temperature rise, which reduces cracking and produces more uniform results. - Start the timer only when the water is at a full boil.
A gentle simmer and a rolling boil are not the same thing. Counting down from anything other than a true boil will produce uneven doneness because the starting temperature is inconsistent each time. - Lower the heat once boiling starts.
Reduce the heat to a gentle simmer after the water reaches a full boil. A violently boiling pot causes the eggs to knock against each other and the sides of the pot, which leads to cracks and uneven cooking. - Transfer to ice water immediately after cooking.
Move the eggs into a bowl of ice water or cold running water as soon as the timer goes off. This stops the cooking process instantly and is also the single biggest factor in how easy the shells will be to peel.
Tips for Easier Peeling
A hard-to-peel egg is one of the more frustrating outcomes in the kitchen, especially when the white tears along with the shell. The good news is that most peeling problems are preventable.
- Use eggs that are not freshly laid
Very fresh eggs have a lower pH, which causes the membrane to bond tightly to the white. Eggs that have been stored for 5 to 7 days peel far more cleanly because their pH rises naturally over time, loosening that bond. - Use the ice bath immediately after boiling
Cold temperatures cause the egg to contract slightly inside the shell, creating a small gap between the white and the membrane. Five minutes in ice water is usually enough to make the difference. - Start peeling from the wider end
There is a small air pocket at the blunt end of the egg that makes it the easiest entry point for peeling. Starting there allows the shell to come away more smoothly and with less damage to the white underneath. - Peel under running water
Water gets between the membrane and the white, washing away shell fragments and reducing tearing. It also makes the process noticeably faster and cleaner.
Common Boiling Mistakes and How to Fix Them
Most disappointing boiled eggs trace back to one of three mistakes made during the cooking process. Identifying the mistake is the fastest way to fix the result.
1. Dropping Eggs into Already-Boiling Water
This approach is common, but the sudden temperature shock almost always cracks the shell. Cracked shells allow egg white to seep out, which changes the shape and texture of the finished egg.
The fix is straightforward: start with cold water and bring everything up to temperature together. Eggs cooked this way are far less likely to crack and tend to have a more uniform texture throughout.
2. Leaving Eggs in the Hot Water Too Long
Even after the stove is turned off, eggs sitting in hot water continue to cook from residual heat. This is one of the most overlooked reasons for an unexpectedly firm or discolored yolk.
Removing the eggs promptly at the end of the timed window and placing them immediately into cold water stops that carryover cooking. It takes about five seconds of extra attention and makes a meaningful difference in the result.
3. Not Adjusting for Egg Size
Large or extra-large eggs need 1 to 2 minutes more than standard-sized eggs to reach the same level of doneness at the center. Many people follow a timing guide designed for medium eggs and end up with an underdone result simply because their eggs were bigger.
Before boiling, note the size printed on the carton and adjust accordingly. When in doubt, add an extra minute and use the ice bath to stop cooking as soon as the timer goes off.
Conclusion
Getting the timing right, from 4 minutes for a soft-boiled yolk to 12 minutes for a fully firm hard-boiled egg, determines the texture, flavor, and nutritional value of every egg that comes out of the pot. Pair that with proper technique, including a cold-water start and an immediate ice bath, and consistent results become the norm rather than the exception.
For food manufacturers, commercial kitchens, and culinary businesses that work with eggs in large volumes daily, Accelist Pangan Nusantara offers Egg Mix Powder as a practical and consistent ingredient solution. It combines the functional properties of both egg white and yolk in a single ready-to-use product, suitable for bakery items, noodles, ready-to-eat preparations, and more, without the need to boil, peel, or process individual eggs.Bagikan
FAQ
Boil for 4 to 6 minutes from the point the water reaches a full boil, then transfer immediately to ice water. The white will be fully set while the yolk stays runny or very soft at the center.
The greenish ring forms when iron in the yolk reacts with hydrogen sulfide from the white during prolonged heat exposure. Keeping boiling time under 12 minutes and cooling eggs quickly in ice water prevents this from happening.
Yes, and it is strongly recommended. The cold water halts the cooking process and creates a gap between the egg and shell membrane, which makes peeling significantly easier.
Peeled hard-boiled eggs stored in a sealed container will keep for 3 to 5 days. Unpeeled hard-boiled eggs can last up to one week when refrigerated.
Adding a small amount of salt or white vinegar to the boiling water can help the egg white solidify faster if the shell cracks, preventing it from spreading too much. It does not noticeably affect taste or cooking time.